|
|
|
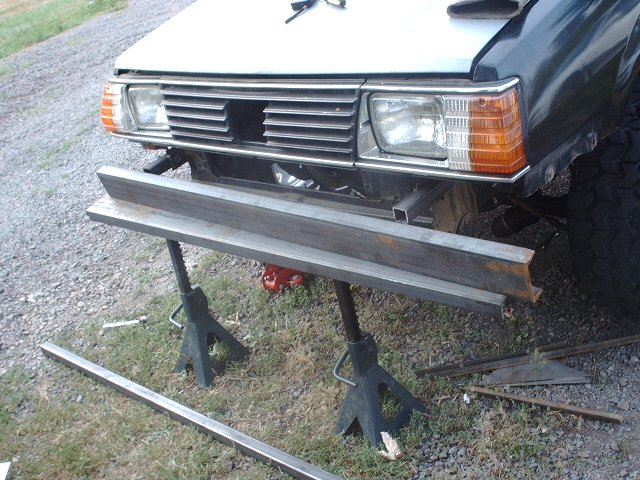
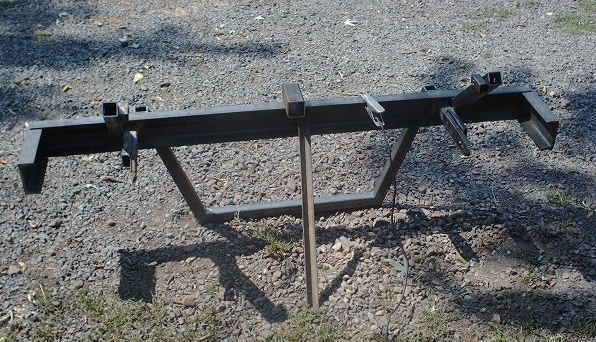
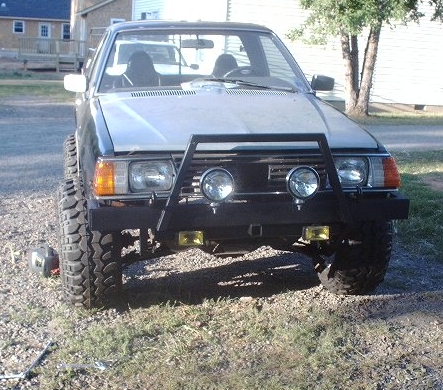
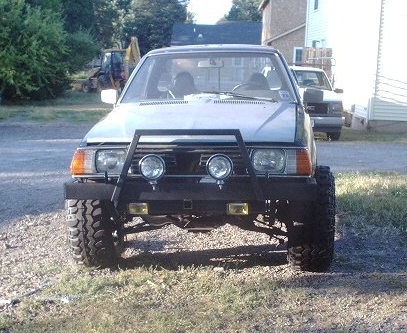
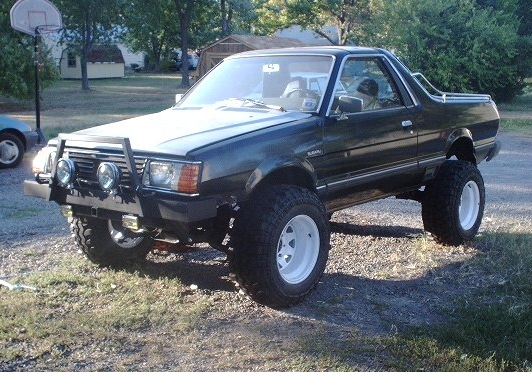
BUMPER BUILDING This project isn't really all that hard to do compared to what you would think. It took two days of about 9 hours each from start to finish. When I got done with it I was just amazed at how well it came out. Fortunately most of it is self aligning. The end result is a very strong bumper that will survive impact with just about anything I can think of and because it mounts to the frame at two points on each side you can lift and pull the truck by it without worry. The first step is materials. The front bumper is exactly 5Ft wide and is made out of 4 inch C channel steel. It is sold by weight rather than thickness. The thickness seems to be 3/8 in most places and about 1/4 at the edges. You will also need a 1Ft length of it for the end pieces. The A frame is made of 1.5 by 1.5 square tubing and the light tabs from 3.5 in angle stock, you will need about 8Ft and 6 inches respectively. Lights are up to you, I am mounting more above the cab so I only went with 4 up front. You will also need about 6 inches of 1x1 in. square tubing and some 1/8 thick x 1.5 x 1.5 plates to cover the tubing ends.
Once you have the materials, first step is to make the bumper upper mounts. These are made from your old bumper mounts and some 1.5 tube. The length of this mount can vary to place the bumper further out or closer in as you desire. I used the stock length, and by that I mean from the very rear to the bolt flange that attached to the front of the bumper. The main thing is that they be even. Cut off the end of the bracket where it flares out and then overlay it with 1.5 tubing and weld it in place so that the tubing begins just after the bolt holes. Bolt these in place and get a support for the bumper itself:
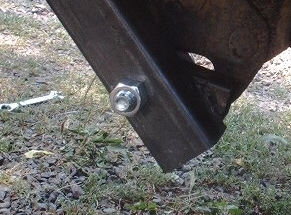
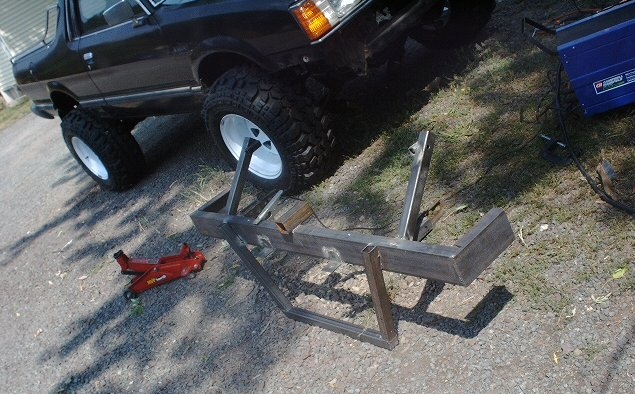
Weld the bumper to the mounts with some pretty strong tack welds, the bumper will be removed for full welding and painting later. Make sure the bumper is aligned at this point and supported to prevent movement. The lower supports go in next. They run from the outside of the tow hook to the back of the bumper. A bolt secures it at the tow hook and the strut is welded at the bumper mount and the bumper. Note the 1x1 square tubing spacer needed to keep alignment.
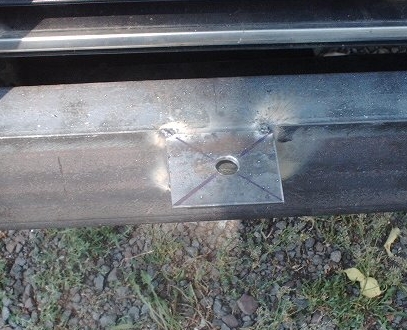
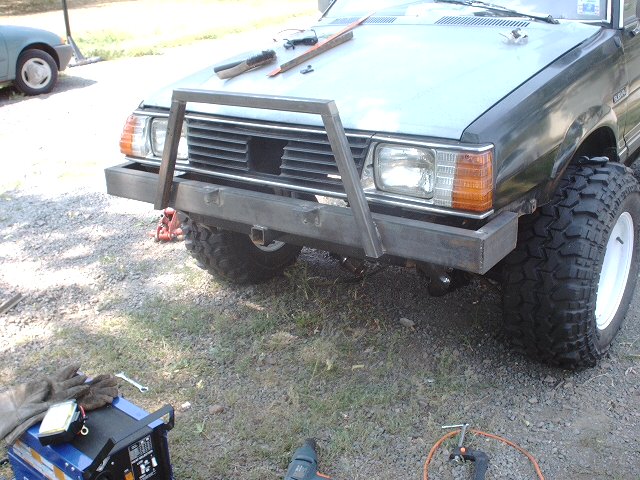
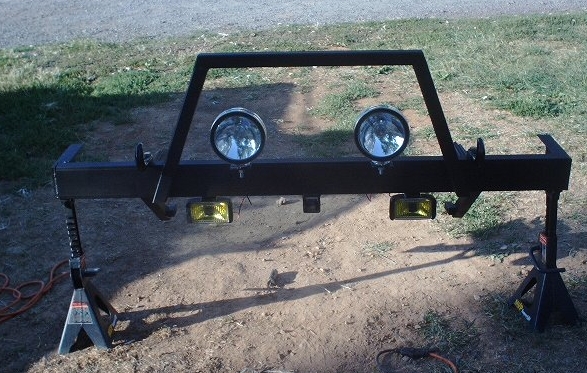
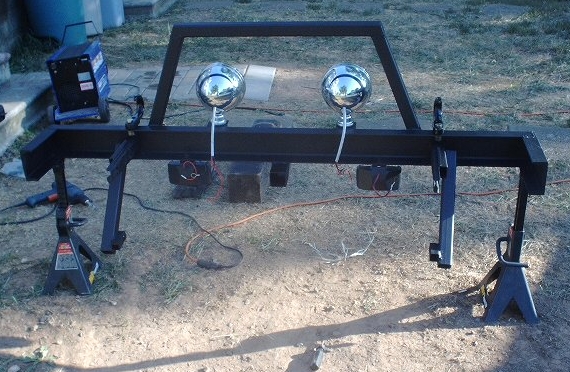
Now that the bumper is secure you can add light tabs, hooks, end caps and the A frame. The end caps are nothing more than the 1Ft piece of C channel with a notch cut out so that it can fit flush on the and of the bumper. The light tabs are the angle stock cut into 2 inch sections and welded to the bumper so that your lights are equal distance from the center. Depending on your model year you may have one or two headlights per side so your distance from center will vary. The 2 inch inner diameter square tubing is welded in the center to serve as a hitch receiver. With the hitch receiver in the front you can mount the winch on a plate with a 2 in tubing so that it can plug in the rear or front, or a license plate etc. I bought two tow hooks at Autozone and mounted them just outside the A frame. The A frame itself is easy. Just make mirror image pieces for the uprights and weld one in place and then position the other one so that the top piece is level and even and then tack the other side in place. Tack the top piece in place and then drop the assembly off the truck. Weld everything on every contact surface.
Paint the bumper as you see fit and then mount your lights. Install the bumper and make sure to install turn signals or convert your corner markers to turn signals.
|
 |
 |
 |
 |