|
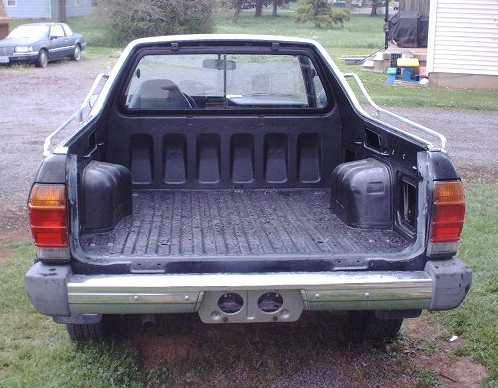
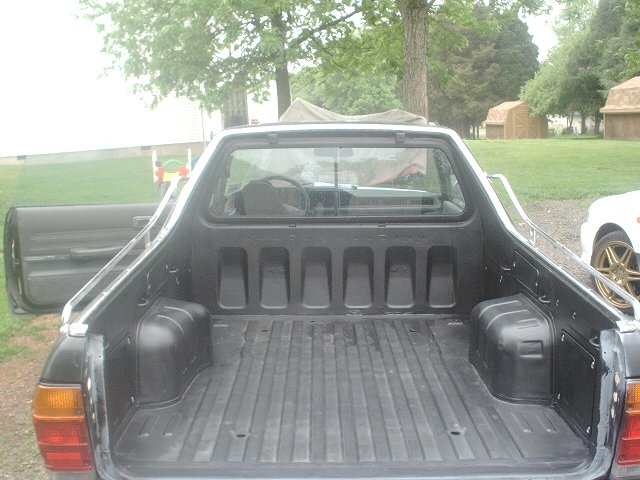
Bed Lining and YOU
As much as we all
love Subaru here there is no getting around the fact that they used thin and
improper paint in the bed of the BRAT. Hence we have so many with rust damage.
The wheel wells are victim as well but they have their own special feature that
causes them to rust out. Every time something scratches the bed good it creates
a future rusty scratch and a future rusty hole. One sure way to deal with
this is with a liquid bedliner. This fantastic stuff also has other uses on the
truck ranging from bumper refinishing to an interior finish. One thing you don't
want to do is underestimate just how evil rust is. The bed of my brat looked
pretty good, and it was, one of the best I have seen, yet there were scratches
as in any truck bed. A few of these had a little rust in them and there was bit
of rust damage along the cab rear wall.
My first inclination was to hit each spot with
the wire brush on the angle grinder and this worked pretty good but I began to
see that a minor 1 in long rusty scratch no wider than a few hairs could extend
another inch in either direction while the paint above looked just fine. So I
made the decision to take the entire bed down to the metal so nothing could be
hidden. After learning all I could I bought a metal jug of Aircraft Remover
which is sold at Autozone, Walmart and I am sure just about any car parts store.
This orange goo from hell is no joke, it will bubble the paint right off the
metal, and burn through gloves, take off skin and cause general harm. Be sure to
watch yourself and apply a thick coating of it so you don't have to go back
again. If you use enough the paint comes right off the bare metal. Wear gloves,
wear eye protection, and watch those hands. You must also use a natural brush, a
plastic bristle one will melt. What you see below is paint bubbling up.
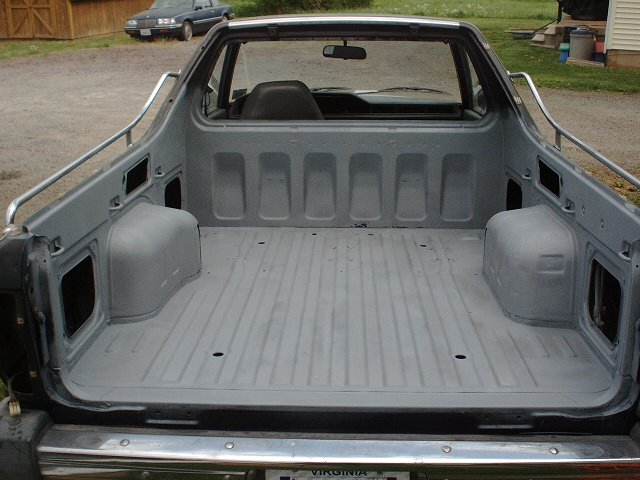
After you get the bed stripped and all traces of
the Aircraft Remover are cleaned and gone you need to treat each and every
little rust spot. Patch any holes and grind smooth any remaining bracket tabs
etc. I had little to do here and things looked pretty good in general. Once the
bed is where you want it to be you need to use a cleaner to remove all
contaminates, I used PrepAll, obtained from Autozone. After the bed is cleaned
you are ready to prime. I used a self etching primer that has excellent adhesion
to the metal. It is rather expensive but it is a hard primer that will not rub
off and it bonds well. After the primer dries you scuff it with a red scouring
pad to allow the bedliner better adhesion.
I removed the chrome trim caps on the bed and used the
seam that is under there as a dividing line for the liner to end at and it is
well covered when you reinstall them. Once the primer is prepped you should
apply a initial coat around all seams, panel edges, and corners. I found the
spray version of the product worked well for this as well as getting in behind
the bed tie down loops and such. After this dries just follow through with the
product instructions which pretty much consist of rolling on a thinner first
coat and then getting thicker. The end result is rather nice and water becomes
irrelevant as it sits on a polyurethane coating rather than on that bare metal
from the scratch you got while loading some tools.
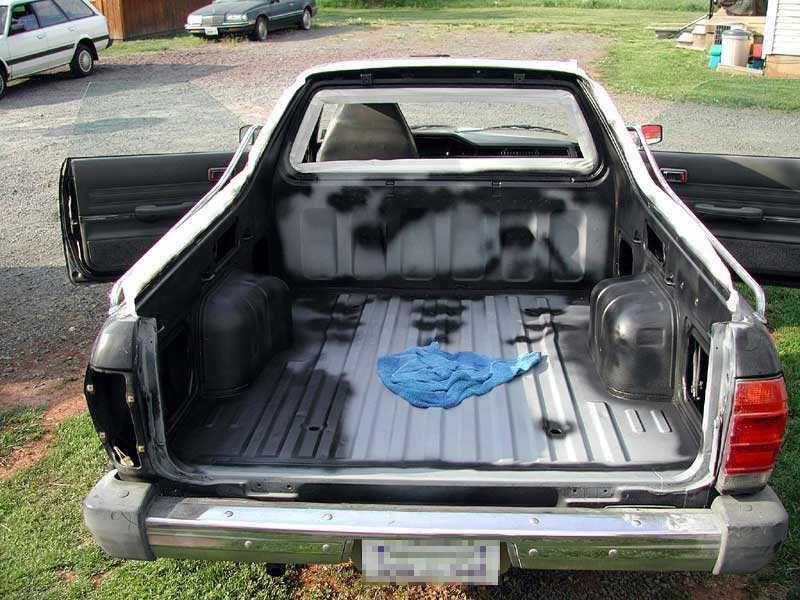
The variance in color you see is about 3 Lbs of yellow tree
pollen.
Tips: Use good protective gear while working with the stripper
Remove the
panels, rear window, and the chrome bed caps
Seal all seams
and corners first
Tools: Natural paint brush for stripper
Basic hand tools for removing panels and trim
Roller for bedliner
Tape, plastic, gloves and tons of paper towles
Chems: Aircraft remover
PrepAll
1 can spray bed liner
1 Rhinoliner or Duplicolor bedliner kit
HOME
|